Batch Import into DSpace Using SAFCreator
This document describes the step-by-step process for performing a batch import into DSpace using SAFCreator, a tool developed by Texas A&M Libraries. The workflow covers installing prerequisites, creating a SAF (Simple Archive Format) package, importing items into DSpace, and adding thumbnails after ingestion.
Prerequisites
Before starting, ensure you have:
Access to the target DSpace instance (e.g., OAKTrust)
Metadata prepared in CSV format
Content files organized in folders
Administrative access (if required) to install software
Installing SAFCreator
SAFCreator is a Java-based application used to generate SAF packages for batch import.
1. Download SAFCreator
Download the SAFCreator JAR file from GitHub:
https://github.com/jcreel/SAFCreator
2. Verify Java Installation
SAFCreator requires Java to be installed.
Open a command prompt or terminal and run:
java -versionIf Java is installed, the version information will be displayed.
If you see an error such as
java: command not found, Java is not installed.
3. Install Java (If Needed)
Download Java from the official site:
https://www.java.com/en/download/manual.jsp
Follow the installation instructions for your operating system.
Note
If you are using a Texas A&M managed system, administrative access is required to install Java. Follow the instructions at the link below to obtain admin access:
https://service.tamu.edu/TDClient/36/Portal/KB/ArticleDet?ID=774
Launching SAFCreator
Once Java is installed, you can launch SAFCreator.
You may double-click the JAR file to launch the application.
Alternatively, 1. Open a command prompt in the directory containing the SAFCreator JAR file. 2. Run the following command:
java -jar -Dfile.encoding=UTF-8 SAFCreator-0.0.2-SNAPSHOT.one-jar.jar
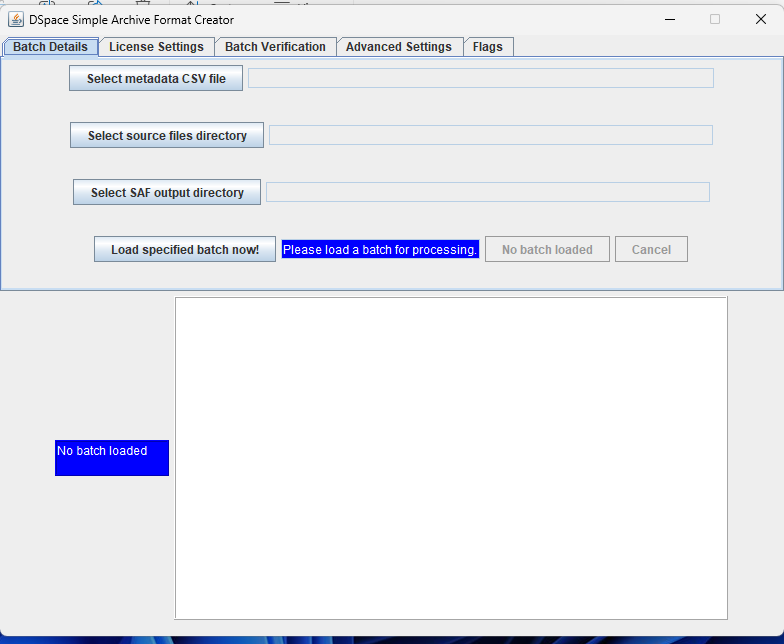
Configuring the SAF Batch
After launching SAFCreator, you will be prompted to fill in three fields:
Path to the metadata CSV file
Source Directory
Destination Directory
Source Directory
The source directory contains the digital files associated with the batch.
Files are typically retrieved from:
DPM (Digital Project Management) OneDrive, or
OKATrust Google Drive
If the files are stored in Google Drive:
Download the folder
Unzip it locally
Use the unzipped folder as the source directory
Loading the Batch
Select the CSV metadata file.
Select the source directory containing the content files.
Select the destination directory where the SAF output will be written.
Click Load Specified Batch Now.
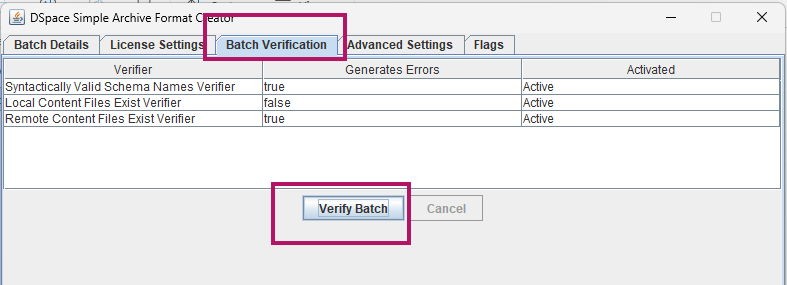
Verifying the Batch
Once the batch is loaded:
Click Batch Verification
Select VERIFY BATCH
Review the verification results
Fix any reported errors before proceeding

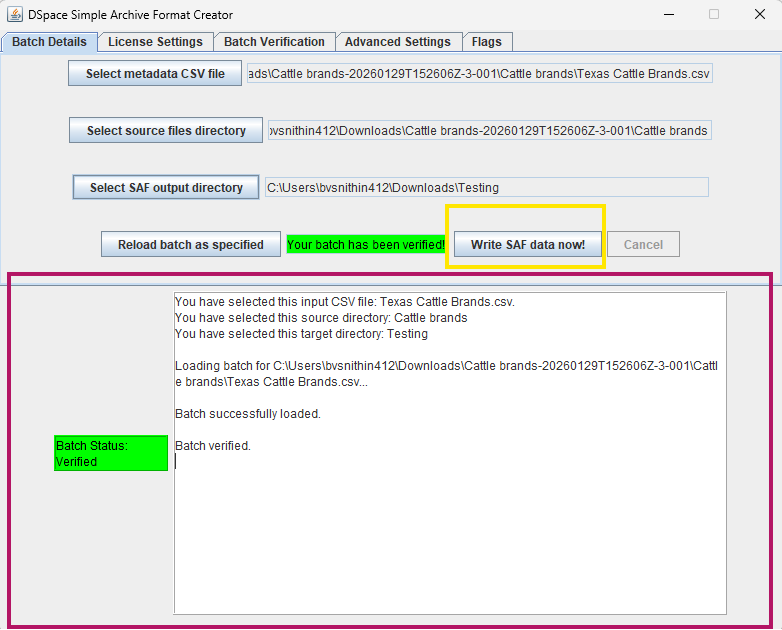
Writing SAF Data
After successful verification:
The Write SAF Data Now button will become enabled.
Click the button to export the SAF package to the destination directory.
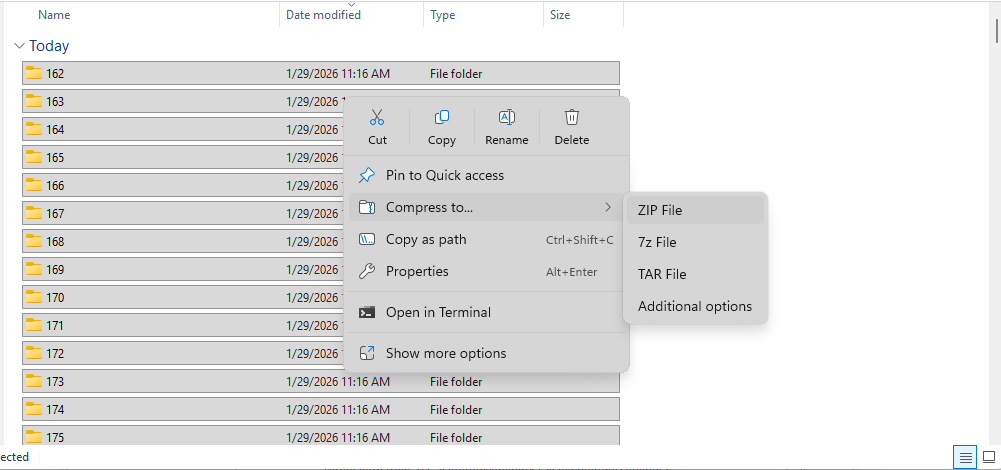
Navigate to the destination directory.
Zip the contents of the SAF output directory.

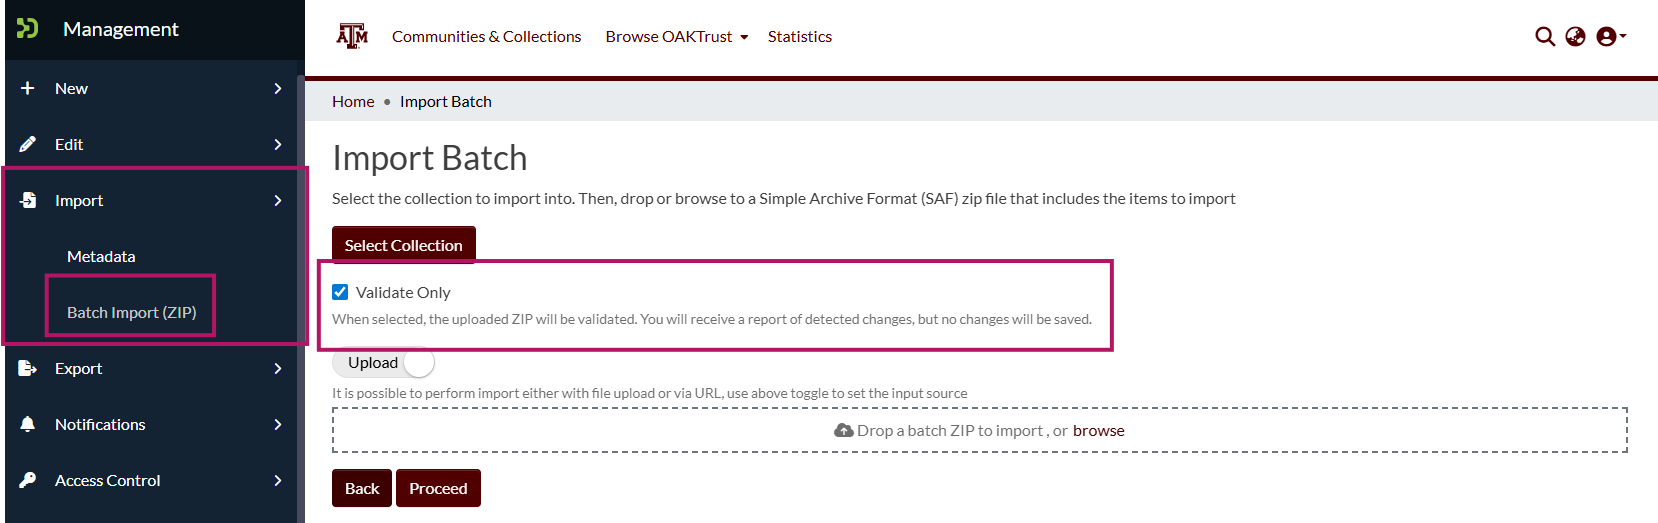
Importing the SAF Package into DSpace
Log in to OAKTrust (DSpace).
Navigate to Batch Import (ZIP).
Select the target collection for the items.
Upload the zipped SAF package.
Important
Ensure Validate Only is unchecked. If checked, DSpace will only validate the batch and will not import the items.
Click Proceed to start the batch import process.
Reviewing Import Results
After the process completes:
Click Retrieve the Process Output
Review the logs for:
Errors
Warnings
Failed items
Address any issues as needed.
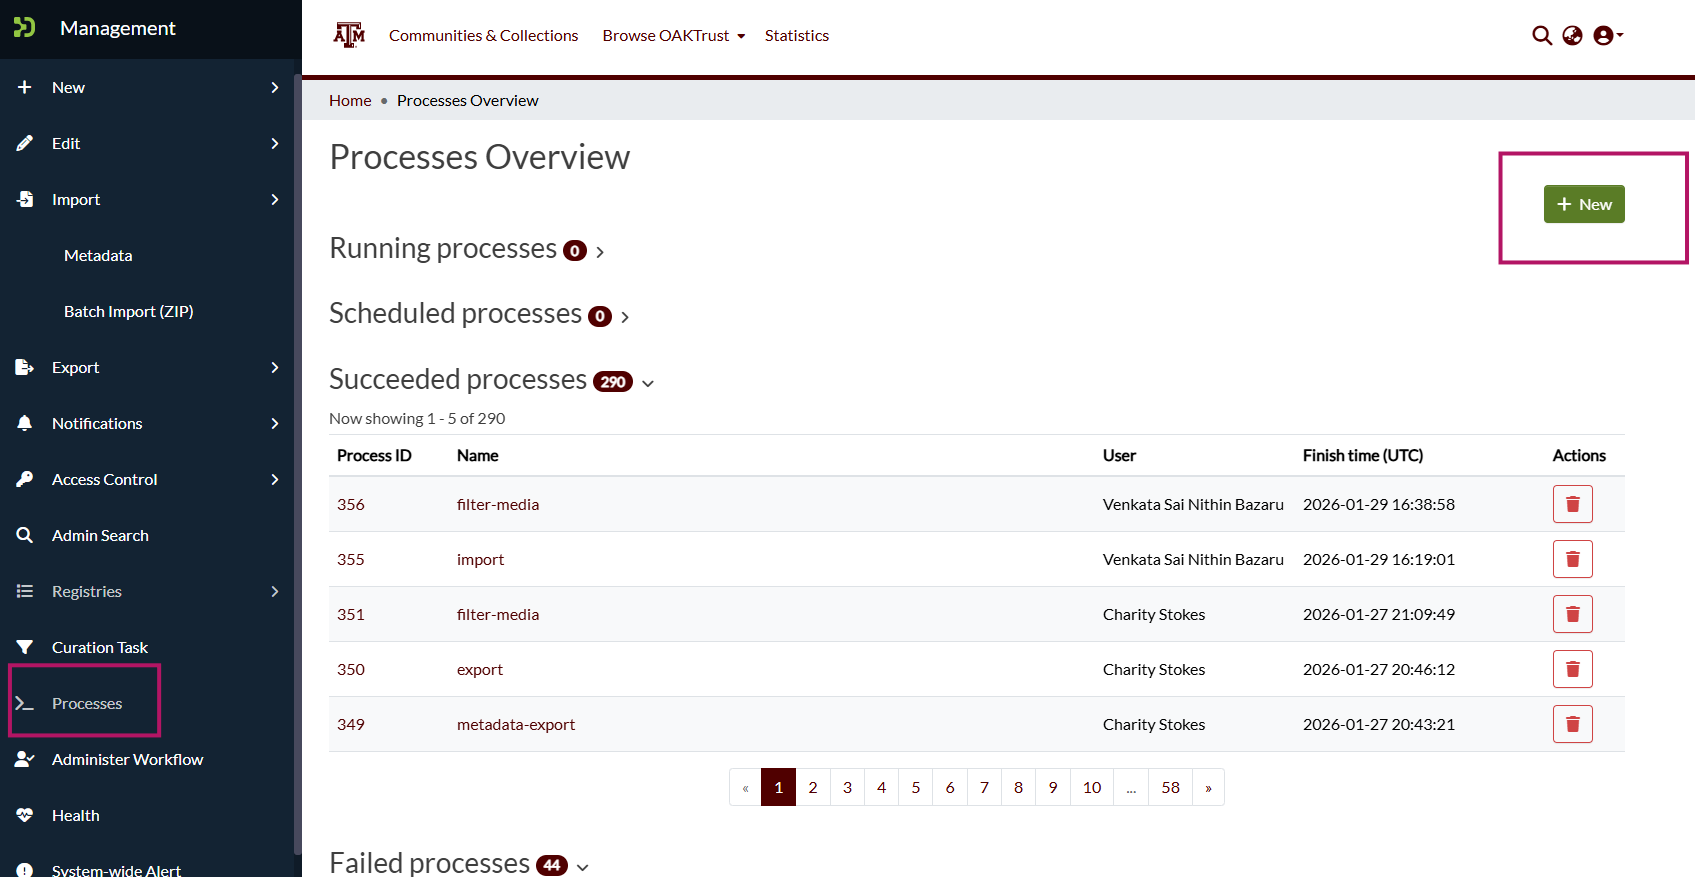
Adding Thumbnails After Import
After items are successfully imported, thumbnails can be generated using a DSpace process.
Navigate to the Process tab in OAKTrust DSpace.
Create a new process.
Select the script: Filter Media
Process Parameters
Add the following parameters:
-i(identifier): The value should be the handle of the collection or item.-force: Forces regeneration of thumbnails.
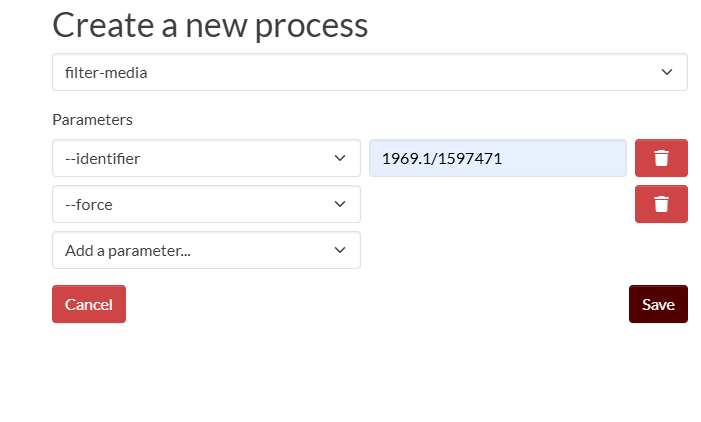

Starting the Process
Review the parameters.
Start the process.
Monitor the process status for completion.
Once finished, thumbnails should be visible on the imported items.
—